We always suggest our students, the moment they buy a new lens, immediately buy one clear glass filter for their lens, so that you avoid any kind of dust or scratch on its front element. Essentially it is to protect the front glass element of the lens. A filter has much more role to play in our photography apart from being just a protector.
A filter is a lens accessory consisting of a glass or plastic element which can be inserted in the optical path either to protect the lens from dust or to modify the image recorded. Depending on the type of the filter one use, it can have a significant impact on the image. Even during film era, photographers use to use filter for special effects. However digital photography changed the use of filters and many of the effects are now possible to obtain with the use of post processing software. Even after advancement in the camera technology and post processing process, there are many filters effects which cannot be replicated in post processing. The most common use of the filters these days are, to protect the lens, to enhance the color saturation, some special effect, to reduce reflection, to take pictures in difficult lighting conditions, to take close up pictures etc. Here we going to discuss about those filters only which are still prevailing in the photography field.
UV / Skylight Filter
Often these filters are used to protect the front element of the lens. However, both of these filters have some effect on your image quality. A UV filter is basically to cut down the UV rays entering into the lens. Most of the professional lenses have UV coating on its glass therefore UV filter does not have significant effect on your image quality. Skylight filters basically have some pink / pale magenta tint which is primarily used to compensate the blue cast created by the skylight. Depending up on the intensity of the blue cast, different grade of skylight filters is being used such as 81A or 85. However in digital photography a correct white balance always compensates the blue cast hence these filters are very rarely used these days.
Modern days lenses have multiple coatings. Therefore, above filters are often used for the protection of the lens. There is a debatable issue whether to add any more glass element in front of the lens or not. Our personal opinion is any further addition of glass in front of lens is definitely going to degrade the quality of picture. Some filter manufacturer claim to have nil effect on the quality of the picture but they are expensive and if we are shooting in extreme dusty environment or shooting situation demands extra protection then it is worth spending on an expensive clear glass filter.
ND or Neutral Density Filters
A Neutral Density filter is used to reduce the amount of light entering through the lens enabling a longer exposure time. Common application of such filters is to create motion blur. Alternatively, photographers use ND filters so that reduced light can give them the liberty to open the aperture to achieve shallow depth of field. In both the scenario, the effect cannot be replicated in post processing, at least with a single image. It is one of the most useful and easy to use filters. The reason why it is called a Neutral Density filter is the filter reduces all light wavelengths reaching to the camera sensor without effecting the color reproduction. It’s nothing more than a semi-transparent glass element which can be placed in front of your lens. It has precise control over the reduction of light amount across the entire visible spectrum.
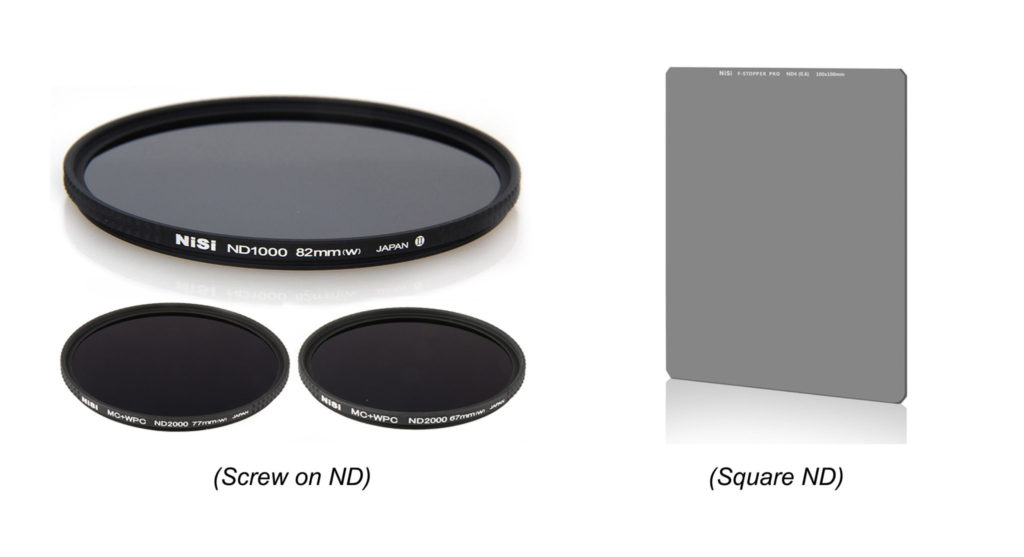
Depending on the light reduction capacity, ND filters can be broadly segregated in the following category.
| ND Number | f-stop reduction | % transmittance |
| 0 | 100% | |
| ND2 | 1 | 50% |
| ND4 | 2 | 25% |
| ND8 | 3 | 12.50% |
| ND16 | 4 | 6.25% |
| ND32 | 5 | 3.13% |
| ND64 | 6 | 1.56% |
| ND128 | 7 | 0.78% |
| ND256 | 8 | 0.39% |
| ND512 | 9 | 0.20% |
| ND1024 (also called ND1000) | 10 | 0.10% |
| ND32000 | 15 | 0.00% |
Depending on the light condition and the desired result various grade ND filters can be used. Most commonly ND is used to decrease the shutter speed to achieve variety of artistic effect such as smoothening the flow the water, emphasizing or eliminating the crowd movement, showcasing the movement of clouds etc.
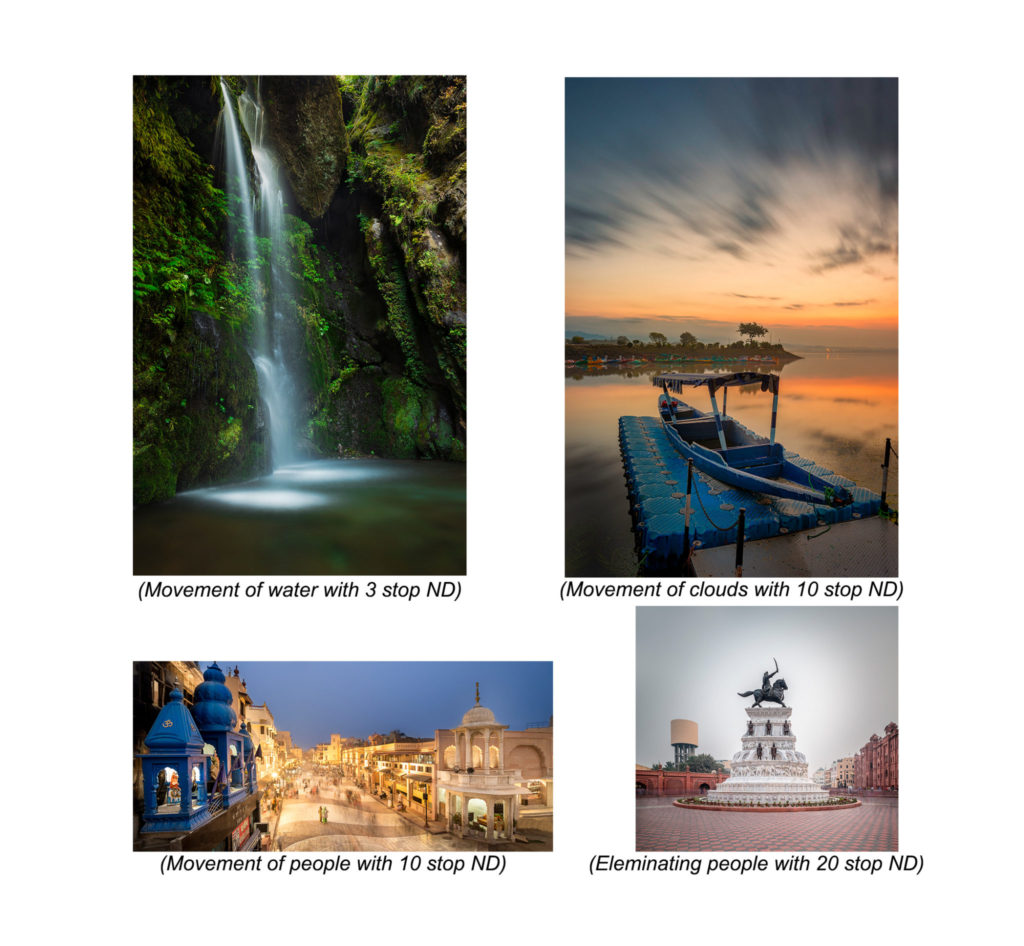
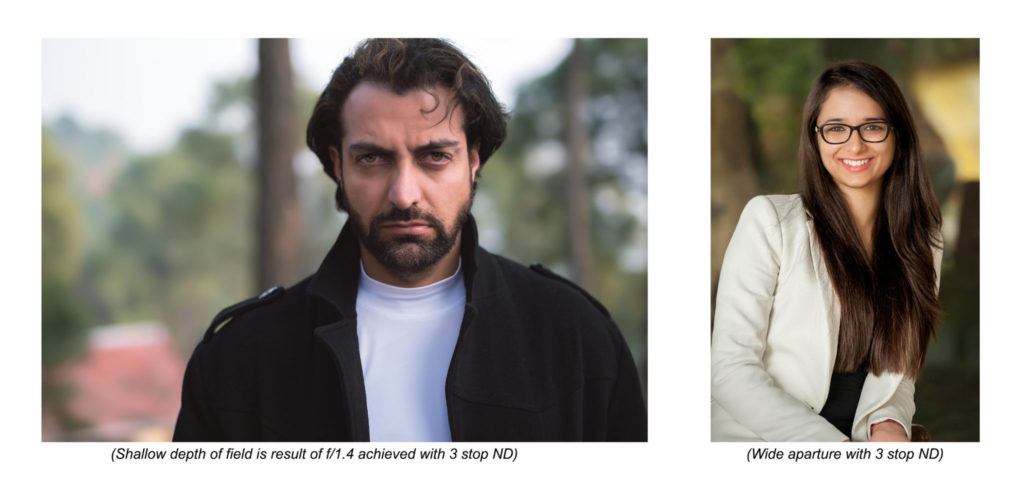
Although above are the most common use of ND filters, one lesser discussed use of ND filter is to achieve shallow depth of field in a bright light situation. Imagine situation where you want to use f/1.4 or f/2 and we have extreme shallow depth of field and the light condition is too bright. Even after increasing the shutter speed to its maximum 1/4000 or 1/8000 we will be not able to get the desired aperture. The solution is, use ND.
GND or Graduated Neutral Density Filters
Graduated Neutral Density filter is a type of ND filter are clear on the bottom and slightly opaque on the top, with either an abrupt or a gradual shift in the middle. They are used to darken the brighter part of a scene so that it falls within the dynamic range of the camera.
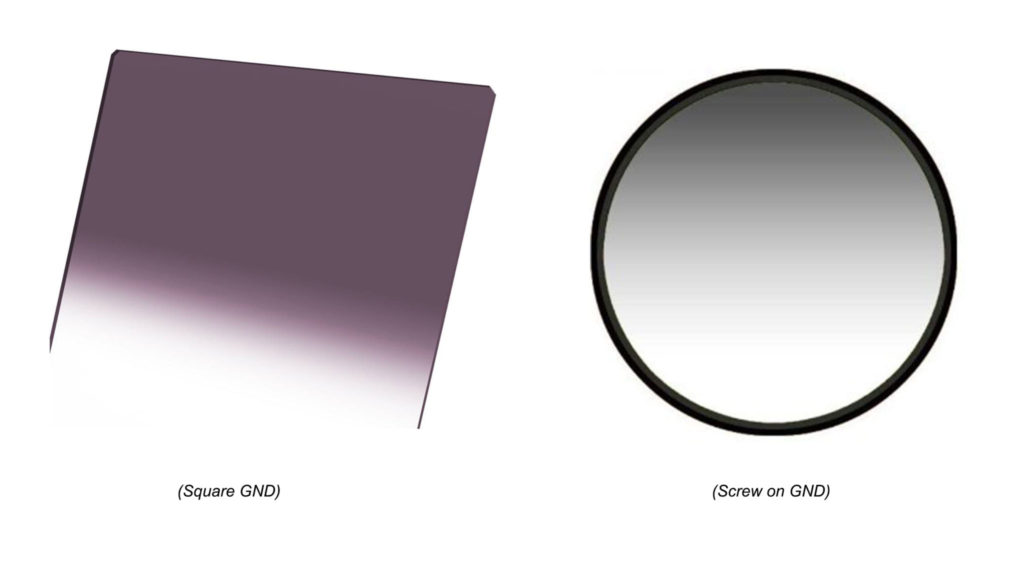
Like ND filter GND also has different grades ranging from 1 stop to 10 stops on the darker side. The most common use of a GND is shooting a landscape during sunrise or sunset where the dynamic range of the image is beyond the recording capacity of the sensor.
GND filters are further segregated in 3 different categories on the basis of the rate of transition. A) Soft GND, B) Hard GND and C) Reverse GND.
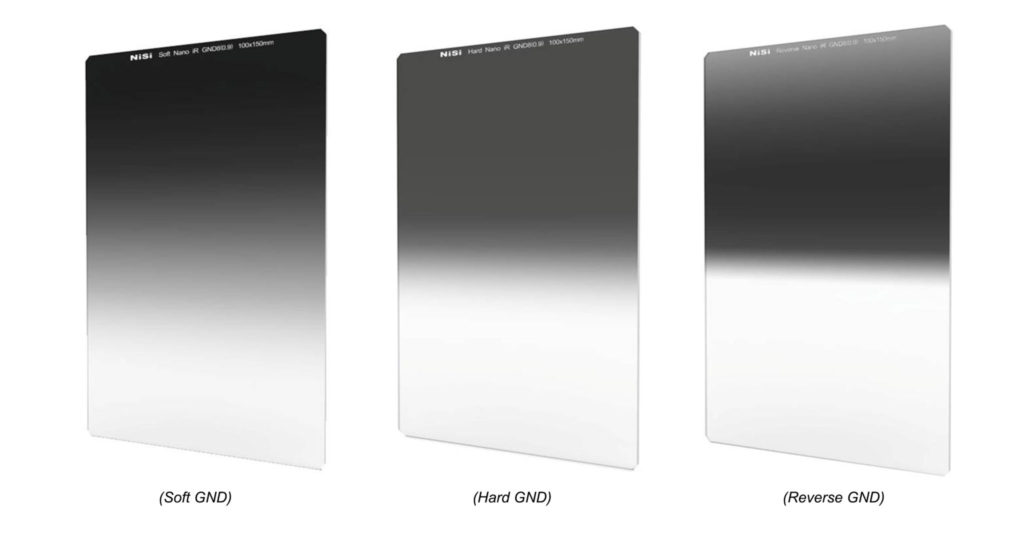
Soft GND: A Soft GND has a gradual transition. It helps us to shoot where the horizon is not flat. Imagine a situation with mountains where it is very difficult to find out a straight horizon. Shooting sunrise or sunset in such conditions need a very gradual and soft transaction of the ND filter.
Hard GND: In contrast to Soft GND, Hard GND has a relatively sharper transition. This is used when the horizon is relatively straight and flat.
Reverse GND: While shooting sunset or sunrise, the horizon is always brighter then rest of the image. The transaction in this type of ND is generally hard and goes from strong to soft. The density of the filter on the centre part is always stronger so that the rising or setting sun doesn’t get over exposed.
Physical GND vs. Digital GND: With consistent development of the sensor technology, the dynamic range of digital camera is increasing day by day. It is often argued that effect of Graduated ND can be achieved digitally by recovering the shadow or highlight in post processing. However physical GND always produce high quality image in comparison to the digital GND. Recovering the highlight or shadow always result in loss of image quality. Another way to achieve it digitally is to take images in different exposure and blend them in post. However, such technique requires many considerations such as a sturdy tripod, moving subjects, and proper blending knowledge.
Other consideration – standard / screw, square, holder
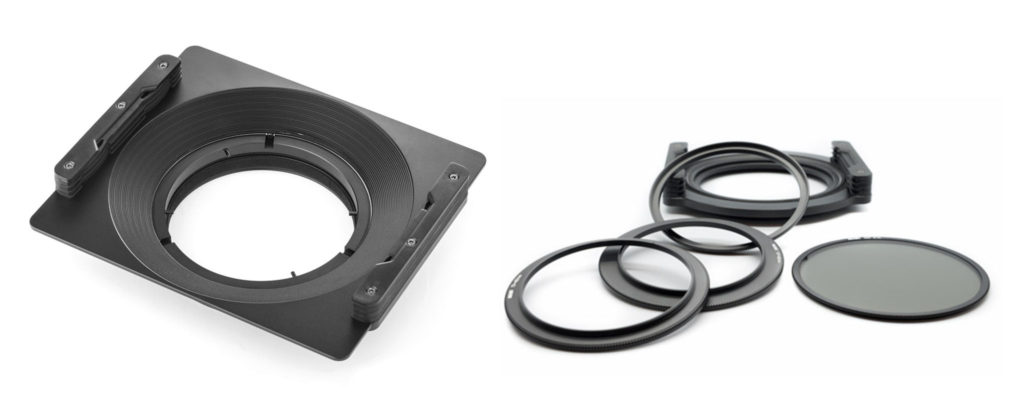
I have always been a great fan of slide on or square filters because of its convenience of uses. Screw filters are limited to its lens filter diameter or you can use with a smaller diameter lens along with a adapter. On the contrary square filters are not limited to any size. You just need to have holder adapter ring for different lens and you are ready to go. Slide on or Square filters are all the more essential when you are using ND filter of high density. Dark glasses are generally not see through hence it becomes difficult for the camera to focus. First focus and then slide on the filters.
Polarizing Filter
For landscape photographer, then it’s a must have a Polarizer filter in your bag. It not only adds vividness to your landscapes, but also cuts reflections on a shining surface hence gives a rich looking color. A Polarizer filters out the sunlight which has been directly reflected towards the camera at a specific angle. The angle is controlled by rotating the filter clockwise or counter-clockwise. It also helps in reducing the haze. Rotating a polarizer allows certain types of light waves to pass through, while blocking other ranges of light waves. Thus, you could turn a sky from light blue to very dark blue or increase/decrease reflections by simply rotating the filter.
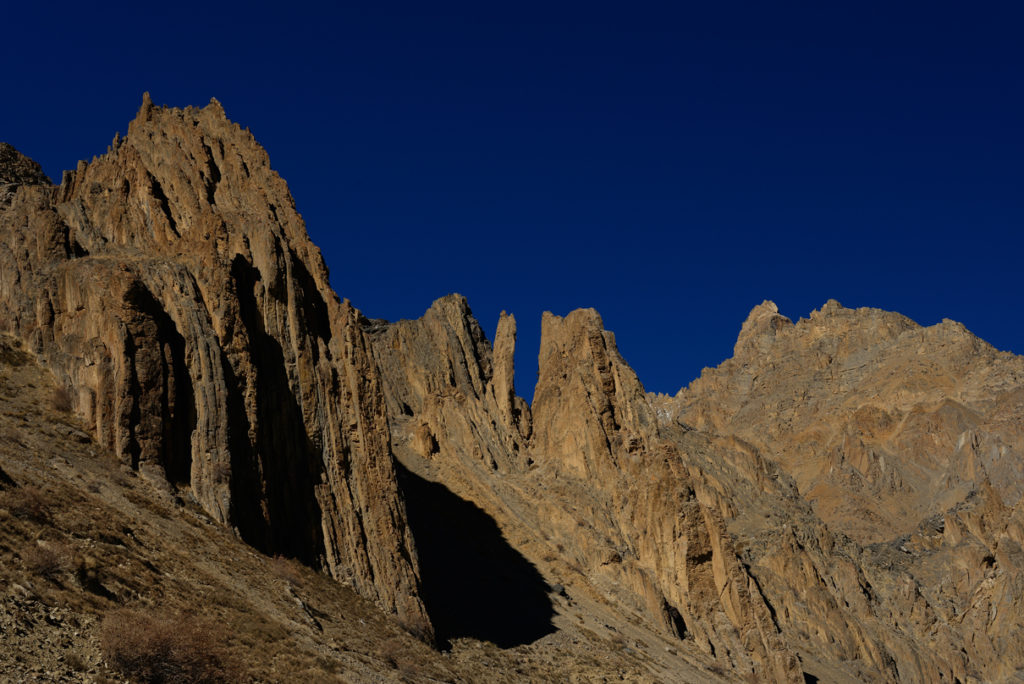
One thing to keep in mind is that the polarization effect is maximum when you use it in a certain angle. The maximum effect of polarization is achieved when the lens is pointed 90 degrees from the sun (in any direction).
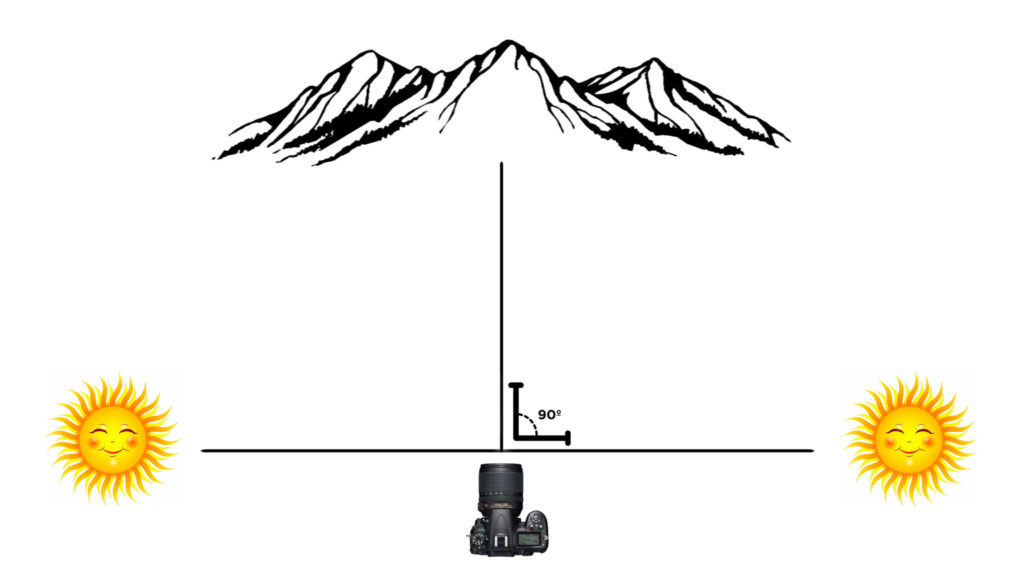
A simple trick is to form a pistol with your index and thumb fingers, then point your index finger at the sun. Keep pointing at the sun and rotate your hand clockwise and counter-clockwise. The maximum effect of polarization will be where your thumb points in any direction. So, if the sun is in front of you, or directly behind you close to the horizon, you might not see the effect of polarization on the sky at all. The polarizer can still help reduce haze and reflections, but it might not do anything to the sky. Also, you have to be very careful when using a polarizer with super wide-angle lenses (24mm and below), because the sky might not get darkened equally, resulting in a bad-looking half blue-half gray sky.
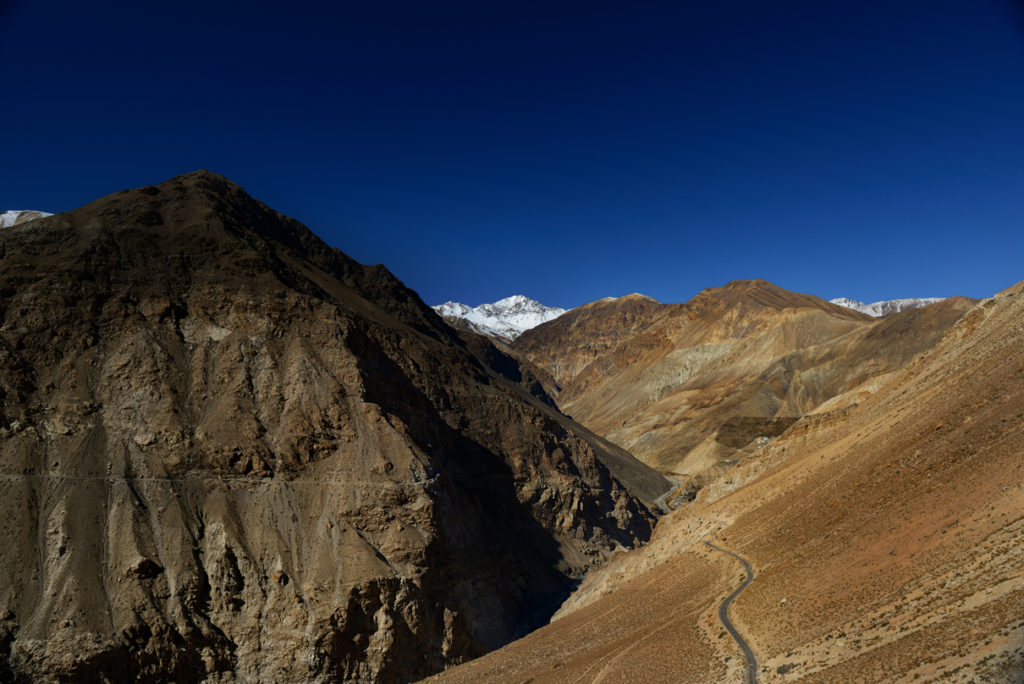
The above image shows how wrong angle gives you a gradual effect of Polarizer Filter. Notice how the blue sky lighten towards the right side of the picture.
Another effective use of Polarizer is to cut the reflection on the signing objects. Particularly when we want to take a picture of water and you want the reflection to be eliminated.
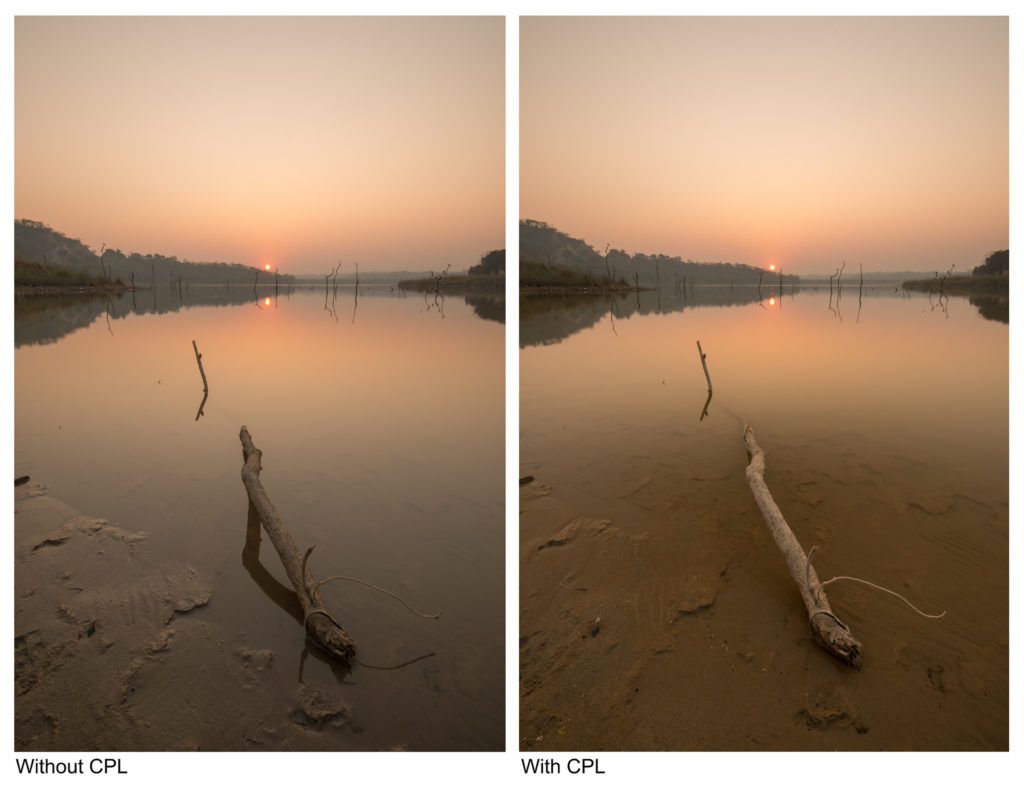
Notice the water on the below image. The reflection on the water is completely eliminated.
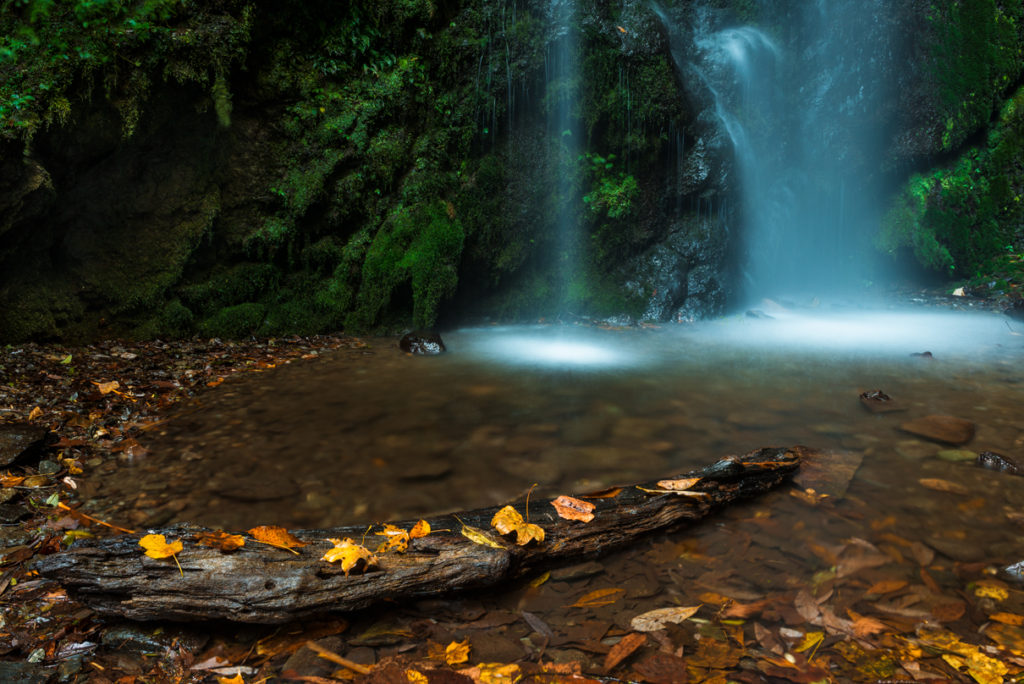
As we mentioned above, a polarizer is a very useful filter for any landscape photographer. It not only gives us creative freedom, it also makes our images visually more pleasing.
A filter is a must have accessories in your bag. Appropriate use of these filters can give you an impactful result to the viewer’s eye. While choosing a filter, please ensure that it should not be substandard because under any circumstances you would not like to degrade the quality of the image you intend to photograph. We personally use Nisi filter system because of its optic quality. If you have multiple lenses a slide on filter is highly recommended.


