Quality means not the artistic part of photography; it’s the technical part of the photography, which explains the question often asked, why the quality of our pictures finer. Our advice is to use your equipment efficiently. It’s true to some extent, but not completely justified to upgrade to new expensive equipment will improve the quality of the photograph. DSLR is capable of producing excellent quality images if used efficiently. Our emphasis would be to take the best out of your existing set of equipment’s before going for newer ones. Here are some of the Tips for taking best quality photographs which are used to get the best out of any camera.
Always shoot in RAW
Raw is only the format to shoot, well the answer is very simple, so to have full control over the image quality and its property. This is one of the most important tips for taking best quality photographs. Technically speaking, all the camera shoots in RAW. It’s when you shoot in JPEG, it converts the RAW image to JPEG through its own internal processing system and saves it in the memory card. The human brain is much smarter than the camera and your computer is much faster than your camera. When you shoot in RAW, you have full control as to how the image will look and hence you can get the best out of your post processing. This takes some additional time, but it’s worth spending.
Another reason to shoot in RAW is that most of the camera gives 14 bit RAW whereas the same camera gives 8-bit color depth when clicked in JPEG. So, it’s very obvious that you will be compromising in on color depth while shooting in JPEG.
Base / Native ISO
We always talk about shooting in Low possible ISO to get best result. In fact, it’s not the lowest possible ISO, it’s the base / native ISO of that particular camera. As it’s known that high ISO attracts grains; it’s ignored to this fact that ISO lower than the base / native ISO also attracts grains. The reason is the digital sensor, which is designed to record light at a certain magnitude. Broadly speaking when increasing the ISO, the camera increases voltage to the sensor to amplify its light recording capacity. Similarly, going below the base / native ISO the camera uses a software algorithm to simulate the higher ISO. Regardless of what is used, amplified ISO or simulated ISO, the result is an increase in noise over the base / native ISO settings. Until and unless, it’s a deliberate effort to generate a grainy picture, which you would never want any grains on your image.
Always use sweet spot of your lens
To achieve greater depth of field, a big aperture number or small aperture hole is fixed, but to get shallow depth of field, it’s the other way around. It’s often underestimated the fact that in both the extreme scenario, the image quality goes down. Greater aperture number causes diffraction and a smaller aperture number causes chromatic aberration. Therefore, use the sweet spot of your lens. Different lens has different f numbers where they produce the best quality image. It generally ranges between 2 stops above the minimum aperture number till 3 to 4 stops below the maximum aperture number. If you are still confused, try f/8, f/11 or f/16 for safer side. Understanding hyperfocal distance will help you achieve greater depth of field.
Use Good Sturdy Tripod
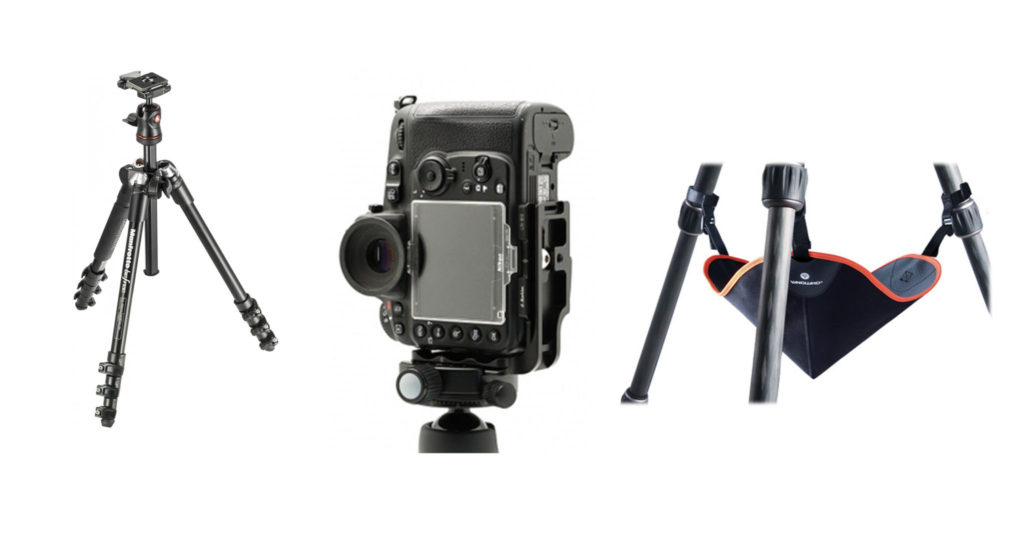
A good sturdy tripod is a lifetime investment. Tripod not only gives you better stability, but also provides you better comfort which results in a better-quality image. While shooting in a low light condition, try using a tripod. With the increasing number of megapixels cameras, little shake in the camera ruins the entire image. Use tripod to be secure. Avoid raising your central column of the tripod or raise as minimum as possible. In case of extreme windy condition, you can hang an additional weight to give more stability. When using vertical frame, try using L brackets as shown in the below image. Make sure the tripod is sturdy and not moving.
Switch off VR/IS if camera is on Tripod
Vibration Reduction (VR) or Image Stabilizer (IS) is a feature either of your lens or camera body that allows you to take a sharper image at a shutter speed which 2 to 5 stops slower than our threshold limit. When VR/IS switched on, it corrects the camera shake. When there is no shake, or when the level of shake is below the threshold of the system’s detection capability, use of the VR feature may actually add unwanted blur to the photograph, therefore you should switch off VR/IS. A tripod is generally believed to prevent image blur, but camera shake can occur due to the movements of the quick-return mirror or shutter curtain, or winds. If the camera is mounted on a tripod (or similar stable platform) without switching off the VR/IS, there is a risk creating know as a feedback loop, in which the camera’s VR/IS system essentially detects its own vibrations and starts moving around, even when the rest of the camera is completely still. This introduces motion objects to the camera system and brings with it blurriness. This is one of the key reasons to turn off image stabilization.
It’s worth mentioning that, for the sharpest results when photographing still subjects, nothing beats a camera mounted on a sturdy tripod with the image stabilization turned off. This is because image stabilization, by its very nature, using motion along one axis to counter motion in the opposite axis, often creates varying degrees of image degradation of its own, whereas a camera firmly coupled to a stable tripod and tripped with a cable or remote release with the mirror locked in the up position will, in almost every instance, take a sharper picture.
Use Remote
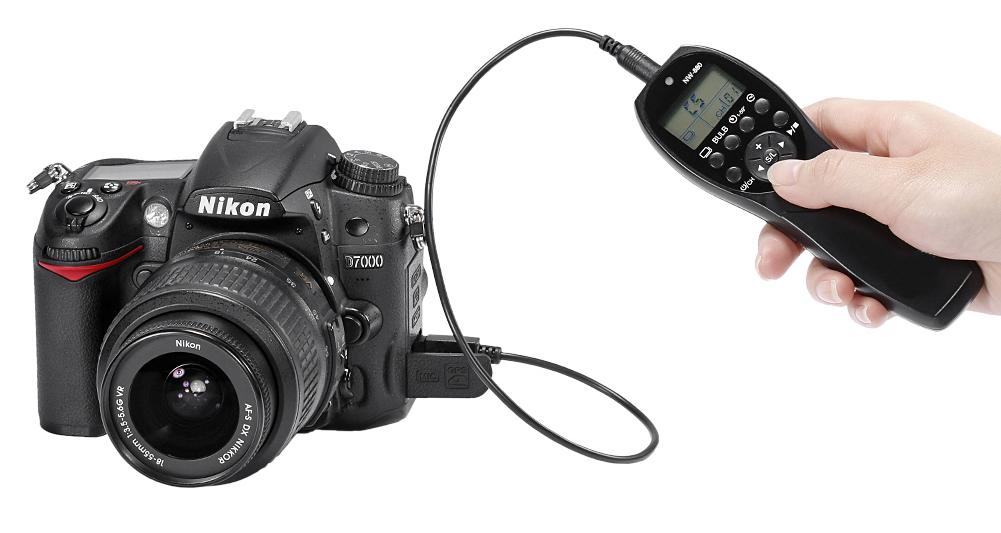
Stay away from the camera. Well, it’s a fact.! Believe it or not pressing the shutter with your finger can also result to camera shake. Set the camera on a tripod, move away and press the shutter with the help of a remote. A remote can be a wired one or wireless. Our favorite is a wired remote. While using, the wired remote make sure that the wire is not hanging. Tie it around the tripod.
Mirror Lockup Mode
Mirror Lockup or Mup mode is often ignored by many photographers. It is often one of the most ignored tips for taking best quality photographs. It’s important to understand the reflex mechanism of a DSLR, you will realize that the image which we see in the viewfinder is reflected through a mirror. The mirror is placed a 45 degree angle in front of your shutter. When you press the shutter button two major things happens in your camera. The mirror goes up, locks itself and the shutter open in front of the sensor.
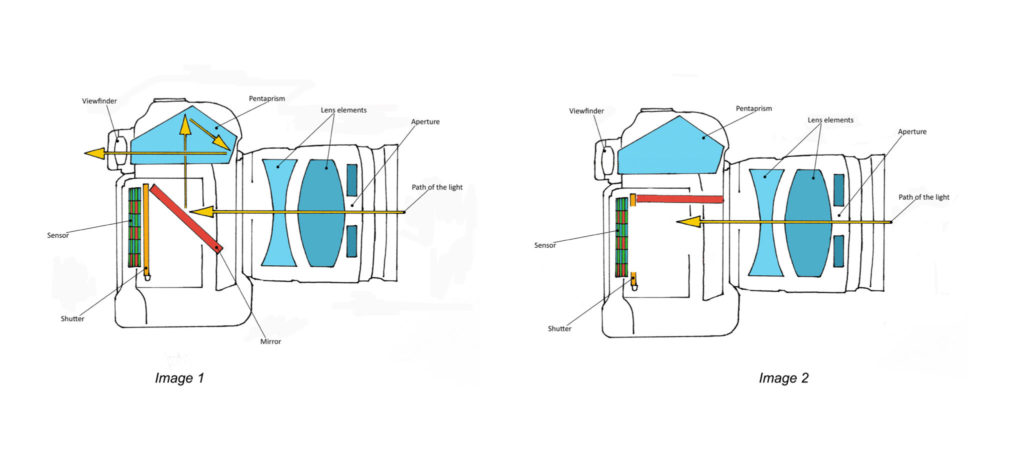
Image 2 shows the mirror is locked up while pressing the shutter button. Therefore, pressing the shutter button, you can’t see any image on your viewfinder. In normal shooting mode when the mirror goes up and locks itself, it causes vibration due to the impact of the mirror when it locks up. However, while shooting in Mirror lock up mode, you have to press the shutter twice. When it’s pressed for the first time, the mirror goes up and locks itself and when pressed for the second time, the shutter opens and sensor records the image. This eliminates the vibration of the mirror lock up process.
Manual Focus / Focus through Live View with Magnification
In most of the situation the auto focus system works perfectly fine, of the modern day DSLR. However, in a critical lighting condition it’s often struggles, particularly shooting in a low light condition. Our suggestion is focusing manually. To be doubly sure, use live view mode. For fine tuning enlarge the view on your live view to the maximum and focus. Please don’t forget the switch the lens to manual focus mode. This way your focus is always spot on. And no matter how many images taken of that particular composition, the focus will not change.
Use Eyepiece Shield
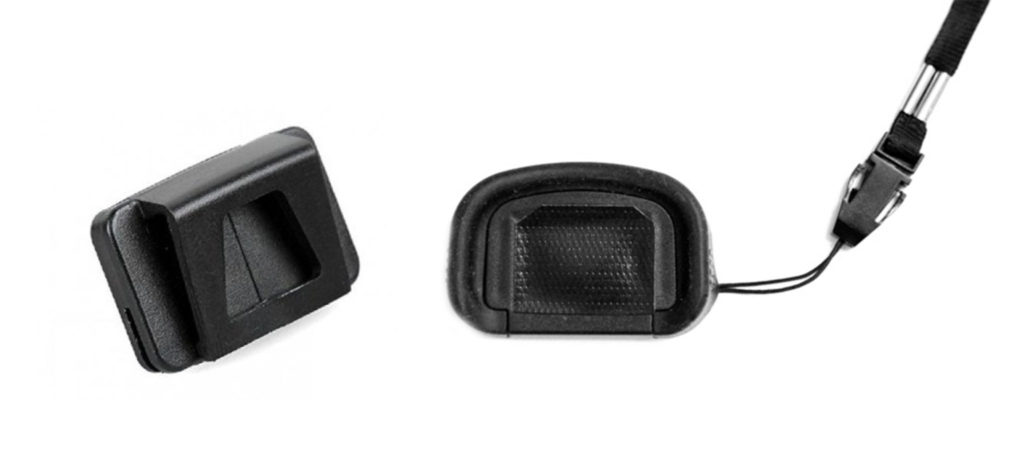
We all know that we see images through the eyepiece in other words, the light comes out through the eyepiece. However, there are possibilities that if the light behind the camera is brighter than the light you are shooting, light may enter through the eyepiece which will affect the exposure metering capacity of the camera. Also during long exposures, light leakage through the viewfinder eyepiece decorates the image quality. Therefore, always ensure to lock the eyepiece you’re your viewfinder is not covered with your face. It is must when you are shooting live view mode.
Avoid use of UV / Clear filter
Additional Glass element in front of the camera does not affect the image quality at all? Well to be honest, it does. No matter how superior the glass quality will be, an additional glass element always decreases the quality of your image. In certain situation, it’s bound to be using it. In such case make sure, it is absolutely non-scratchy and clean. Some scratches, dusts, etc. are very prominently visible doing long exposure images.
Histogram
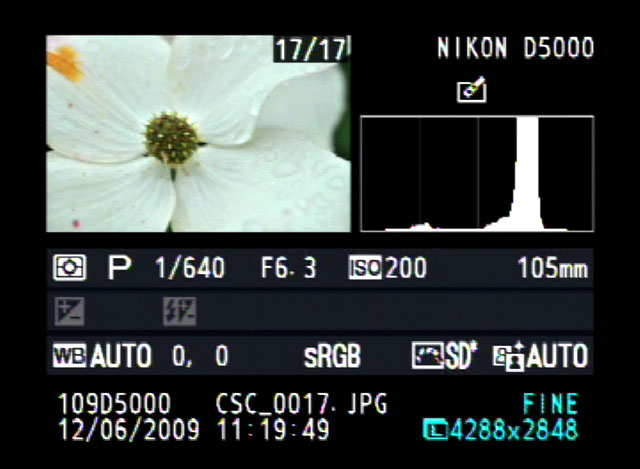
Digital SLR gives you an advantage of reviewing your image immediately after you take the picture. The quality of the image we view depends on the quality of the display we have on our camera. The quality of display does not ensure the quality of the image. Therefore, it is always advisable to refer to your histogram to ensure proper exposure. Modern day DSLR has high dynamic range in the picture they take. Any over exposure is always difficult to recover and any shadow recovery always attracts noise. Understanding histogram is always worth spending time.
Compose properly to avoid cropping in post
Compose (e.g.: straight horizon) the image properly to avoid any post cropping, which results in loss of pixels.
These are a few Tips for taking best quality photographs which will help to take better quality images (technically).


2 Comments
Fotovoyage is an eye-opener for the travel bug and the photography enthusiast as well as the novices.The webpage has been designed to perfection and the details of the travel blogs and the pictures accompanying are awesome and surreal. The author’s have really put their mind and time into this venture and has done a commendable job. Thanks for sharing your view to the world and keep doing what you do best.
Jai Hind
very very helpful